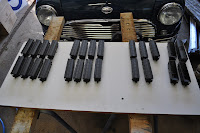
The horizontal steel bars on the ends were now installed. These could not be put in place earlier as they pass through the corner post that is part of the sides. I discarded the course plastic roof that comes with the kit and replaced the lower section with a piece of 0.010" styrene. Small angled blocks from scale 1" x 3" styrene along with a top runner make up supports for the top half of the roof. AR corrugated iron and a couple styrene battens completing the roof. I then weathered the model with various application of acrylics.
I ended up using the Bergs chassis sides. I also used the flat floor section, though the time it took me to file flat the raised plastic blocks that originally held the brake cylinder etc, would have been quicker to use a piece of styrene. I glue two centre sills, from I beam styrene, to the now flat floor. The ends cut down slightly to accommodate the KD boxes. The side frames also glued in place. I then proceeded to add all the brake detail to the same detail level as previously described in earlier posts along with RP25-88 wheels. The completed underfloor black etched and installed under the wagon. I have left this loose so i canload on some beasts at a later stage. The final weathering applied to the entire model the finish it off. The result i thought was very pleasing.
 |
| Must get to and make a diorama instead of a cardboard backdrop! |
The KF was also painted and weathered. The decals were a pain to fit. I had some old decals inherited from a deceased estate that had gone hard and broke when slid from the paper. I managed to fit all the appropriate ones including the Capacity and Tare along with the Wagon number on the builders plate. I cheated a bit and used several numbers from Microscale UP loco decal sheet. I also fixed the Coupler release lever so it matched the prototype and added a couple tie down rings on the ends. The lever now hangs from underneath the wagon. Just needs a nice farm tractor to finish it off.
Along with the KF I put through the paint shop the ABV and a couple S and K wagons. I found on a Weathering Forum an article on using Windsor & Newtons Water Mixable Oil Colours for creating Washes, stains and rust. The paints are mixed with Micro Sol decal solution to whatever consistency is required for the job at hand. I Thought i would give it a go on the ABV and the S wagon. I might do a step by step on this technique in another post.
The DOT also found its way to the Paint shop. Like most weathering i do, I get carried away and they usually end up more weather beaten that originally envisaged. The Rust on the top was done using the Oil Colours but sponged on with a cosmetic sponge. Take my advise, ask permission before stealing the wife's!
Last week the postie delivered a big box full of Trainorama BWH/FWH wheat hoppers. These also I wanted weathered ready for Melbourne to make up my block wheat train to run behind the 42. I divided the 20 wagons into about three groups so as to achieve Light, Medium and Heavy weathering so as they didn't end up looking all the same. I added a couple BCH's and an FHG as well.
 |
| Above on top is the Medium, and below that the Heavy. I forgot to take a picture of the Light one! |
 |
| The Heavy weathered BCH. I added weathering to the inside as i will have removable coal loads so i can run empties and fulls. And the FHG below with guard. |
Just for an experiment i added some working markers to the rear of the FHG. 0.75mm fibre optics and a couple LED's powered from pickups on the bogie's makes all the difference.
Wagon week was this week, Next week is Loco week. I have a couple decoder installs to do as well as a few repairs and more weathering. As usual not enough time in the day. Sorry for the stack of Photos. They do I feel tell a thousand words. I will try and do a post about the Loco work before my Melbourne trip. If not if you attend the show, drop by the layout and say gday.


.JPG)