Friday, December 17, 2010

Exciting Stuff

Well I just don't have any decent excuses why I haven't done an update on the blog, only that I have been too busy. The silly season makes work hectic at Bluescope Steel (that's were I have to go to earn a crust), and most days have been spent working on the house extensions, so modelling time has been next to none.......Saying that I have had the pressure on buy a friend to finish off a couple jobs I agreed to do.
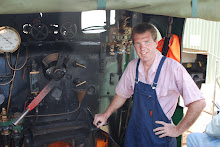
Last October at the AMRA exhibition my good friend Graham Quinn snapped up from Mr Cunningham some Eureka 38's that were Duds. Available were tenders and Mechs, Both with bodies, sold as separate units. We were told that the problems with each unit were unknown but were faulty. Graham was able to put together 3x 38's total.

Returning home after the show the units were coupled with the mechs. He ended up with matching 3801 loco and tender, 3830 Loco and tender and the odd one out 3805 and a 3830 tender. I was asked to asses the units to see what was actually wrong. As it turned out both matching units worked perfectly and unbeknown to Ron they were all sound units. At first the third unit would not work. Knowing that the first two worked OK we tried the working tenders with the 'Dud' Loco and as I thought, it worked fine. My intentions then were to remove the IC chip from the working unit and put into the non working unit thinking that this may be the problem. Bingo! worked Perfect. I then reinstalled the Dud chip into the other tender and to my surprise worked great..... and still is. We now had all three 38's working fine with sound. What was wrong with them Ron?
One issue that now arose was the colour difference in the two greens of the 3805 and 3830's tender. Graham asked if I could weather the two and hide the colour difference. It was agreed that the colour difference was too dramatic. Graham was going to wait till the next show and buy chance pick up a 3805 tender however silly me suggested to repaint the whole loco, but I was NOT going to re line a green 3805. Graham already had a couple Brass black ones so that was out........"How about Grey"?.

Now the work begins.

I stripped the whole loco down. Even separating the cab, running boards and details from the boiler. The tender body was also separated from the chassis along with all the pressed on details. I masked up the silver sides of the firebox as I wanted these left this colour.

38 Stripped and ready for paint.

I then proceeded to air brush the whole loco with a mixed up 'close enough' grey. I let this dry for a few days.
90% of all the grey was masked off ready for the black. I use a automotive etch black made by Wattyl. I painted all the wheels along with all areas to be black. I was then able to reassemble the loco applying all the appropriately painted details. Ladder, power reverse, air pump etc. Nickle silver numbers were used for the cab sides along with Brass builders plates. I was unable to source black decals for the number on the back of the tender so I painted brass numbers black and applied these with a small amount of PVA.
All three 38's now received my black wash mixture using the Water mixable Oils and a little weathering with the air brush to finish off. The end result was very pleasing for a few 'dud' locos!


Completed 3801 in Grey.


Green 3801 with Very Light weathering.
 Apart from the 38's and between house extension work I have been working on assembling the Pilot models for our ANDIAN models LWW Well wagon and Turret Tender Kits. I have them basically finished and have taken a few photos. Just need to get to and write the email. The next post will detail the projects.

I have mentioned that I have been busy working on the extensions to my house. Although not real exciting it is coming along fairly rapidly. We are just waiting for the tiler to tile the bathroom floor and hall before the skirting boards go on. The exciting part is the next job is the Train room slab. Father in law has been busy preparing the ground for Crusher dust and has started on digging the footings. Exciting Stuff! Will keep you posted on progress.

Well that's enough for now. Hope you all have a Merry Xmas and that Santa Bring lots of Trains!
Ho Ho Ho Chuff Chuff Chuff.

Ian

Saturday, November 13, 2010

New England Convention 10.0.0.04

So I guess I should say a few words about the convention. My weekend started on the speedy side! I was able to get a leave pass for the weekend leaving both the missus and the Kids at home. This gave me a chance to get the Cooper S out and give it a good run. Dorrigo mountain proved to be great fun until I got hit with the lights, as a result of roadworks, half way up . The car went like a rocket the whole weekend.


 I arrived about 3pm. Ian and Andrew had Bowen Creek setup at this stage and looking good too. I registered in and proceeded to lay out a few items I had for show and tell. One of these was the etches for both our Turret Tender project and LWW well wagon. These had literally turned up on the Friday before I left, just in time. They look good too. The well wagon is pretty much complete. We just need to negotiate the bogie's and wheels and we should have them available. The turret tender needs all the casting details done along with its bogie's. Hope to have them ready soon. I also had a 100 Ton SL heavy load wagon. My offsider Andrew lee had this 3D printed. We are negotiating having this cast in Urethane and hope to have it available as well. I am going to start an email list for those who are interested in them. If you want to be added to the list send me an email. iphemist@dodo.com.au. Otherwise I will no doubt keep you all posted here as well.
This is the second sample of etches for the Turret Tender.

And the LWW Well Wagon.
 It was great to catch up with all you fellow Blogger's. What a great bunch of guys. Andrew was right, We all must have stood in front of Bowen Creek every chance we could, even when the trains weren't running. Its a credit to both Ian and Andrew. My 19 class found its way along the Bowen Creek tracks as well. Looked right at home too. There was an issue with the Flange ways but. It did not go down well when I suggested they were out of gauge! Ha Ha Ha! There were however many a 'click' from the cameras when the steam came to town!

Some of the better shots from my camera......


One such steamer that also made its way through Bowen creek was this 36. Built by Steve McElroy of Kyogle, his super detailed DJH 36 was fantastic. Most impressive was the lubricator pipework. Very nice. Dam these guys who keep lifting the bar for us.

The late Rodney James Exeter Bank modules were a great hit too. I remember seeing these in Rodney's shed in Grafton when they were being built. Rodney was truly a very talented modeller and great guy too. Great to see them out of the trailer again. I hope Warren exhibits it again.
The dinner Sat night was superb. Especially the desert.....Though Peter Boorman and myself were in the shit for having two servings of Chocolate cake and Cheese cake. Well Worth it but. As Andrew mentioned in His report, Exhibition organisers have a lot to learn. I probably see more than Andrew with our Coffs Harbour Layout. The organisation from the New England Club has always impressed me. I have been to several of there shows and conventions both as an exhibitor and outsider and without a doubt they are the best. Well done again.
Both Rhett Herbert and Len Durkin done a couple side show alley modelling Demos most of the day. Rhett's modified sheep vans were very nice. The sides were cut down and glued Camco GSV's and the rest from the bergs BSV. He also added brake detailing to the underside. Len kindly offered to build up some Fastracks points for me using my NSWGR no.7 Jig. He done a great job. Nice work.
Along with Rhett and Len, Laurie McLean had small demo of sounds and Animations for Model railways. Laurie Seems to come up with unusual tricks all the time. His ON30 Loco had it all. Lights, sounds and even a fireman that shovels coal. What a character too!
Gerry (the gooroo) Hopkins was there with his decoder pro. Simply an expert with decoder pro. Along side was Dean Bradly with his Heavy handed weathering. He was happy to hand out his secrets for his beautiful weathering. His clinic was very informative too.

That's all. Someone else can fill in the gaps. Should have another update for the past weeks modelling soon.

C U All.

Ian

Saturday, October 9, 2010

'On The Band Wagon' with 1942

Thought I would jump on the band wagon with the exhibition reports from the Liverpool Exhibition. I won't get into what was there as the others have covered this. I Will however comment that I had finished one of the 19's that I had been working on before the show. 1942 ran perfectly all weekend during our NSW sessions and the comments from modellers, who know the 19 Kit, where encouraging. Our layout was also awarded the ' Best Non Australian Prototype Layout' again, as it had last year.
 
View of the Layout at the AMRA show, Liverpool 2010.


As usual I gave the credit card a work out. Joe From Casula Hobbies had set aside his new 30 tank kit for me. These are the same as the old Lloyds kit. It has been upgraded with new etches, castings and prototypical wheels from Romford. If you are after one of these kits you will need to order one through Joe as he is only doing these in 15 lot batches as required. Pretty reasonable too at just $295.
I was also able to pick up a Massey Ferguson Tractor for my KF Flat wagon. I Picked this up from Anton. It was with his Farm Machinery Shed Kit that comes with the tractor. He said that he has had a lot of trouble sourcing these. The Wiking factory told him that they were out of stock and were not sure when they will be re run. I guess I will use the shed on the layout somewhere. I also picked up a pack of code 70 rail to build up my Points using the Fastracks Jig that I purchased in Melbourne, That should keep me out of trouble for a while. Looking forward now to the Convention in Armidale.

Here are a couple shots of 1942 and the layout at the show. I have a short Video of 1942 as well.


Friday, September 24, 2010

Out With One....In With Another

I hope its not just me that seems to start a different project before the one before is finished! Whether it be because you run out of materials, loose interest, or it gets put into the too hard basket. Again I have pushed aside what I had started a few weeks back and dragged out a new project. Actually this one was put into the too hard basket 6 months ago after having trouble with the decoder. As the Sydney Exhibition approaches rapidly, I thought I would try and get this project back on track and finished so I can run it on the layout at the show.

I was given a couple of Easy Kits 19 class kits to build for a club member. One of which would be for myself. As usual I could not simply build the kit straight from the box. I thought I would have a go at fitting sound to both the loco's. The 19 class kits from the box are driven with a can motor mounted in the tender and shaft drive through a gearbox to the rear diver. Fitting the sound decoder and speaker to the tender, like most other loco's, was not possible. If I was able to mount the motor inside the boiler of the loco and drive through a taller gearbox this would leave a small space inside the tender for the decoder and speaker.

I had a couple gearboxes spare from two DJH 50 class kits (another project). With a few modifications to the chassis and boiler of the 19 class, the gearbox fits perfectly with the input shaft lining up dead centre inside the boiler. I ordered a couple 10mm round can motors from the UK, along with the new gearboxes for the 50 classes, that fitted neatly inside the boiler held in place with a couple bits of blue tack. The decoder is a SoundTraxx Tsunami 750 C class mounted on top of a 15mm x 25mm speaker. I later glued the decoder to a 2 dollar coin as a heat sink. I also added a cam operated chuff to the rear loco driving wheel and extra pickups to the tender as well as the usual working headlight. The result was worth the effort. The only downfall is that once the loco is finished it is almost impossible to get to the motor. I have written a detailed article on this conversion for AMRM. At present both the loco's and running but are not finished. All that I need to do is finish off the detail work and I can send them to the paint shop. That's this weeks Job. Once the loco's are finished I can take further photos and submit the article to the magazine. Keep your eye out.
Here is a sneak preview of the pics.

View from the underside showing modifications made to the boiler and chassis.

Tsunami decoder mounted on top of speaker. I later substituted the doubble sided tape for a 2 dollar coin for heat sink.


The above two photos show both tender variants with extra pickups added.

The almost completed loco with new gearbox installed.


 I will post some pics when they are finsihed.


I promised in the last post I would try and show how to do the weathering using the Oil colours. I may have mentioned that these are Water Mixable Oil Colours from Windsor & Newtons. Below is the process on the NR and 42.

I only used two colours for the NR and 42, Ivory Black and Zinc White. I mix the paints with microscale decal solution to a tea like mixture. For the NR the first step is to mix up a weak black wash on a plastic pallet. I use the lid of a Chinese container. Good excuse to get Chinese for tea!


Apply the wash over the entire model. You may find it will 'pool' a little. These can be brushed out as it starts to dry. You will see it highlight the grooves and grilles on the loco. Depending on the consistency you mixed you may want to apply a second coat depending how weathered you want your loco.

To create stains and runs from vents etc, apply the black paint straight from the tube in small dabs with a small brush. See picture below. Work on small areas at a time. Then 'wet' a second small brush with microscale and drag the paint down the panel. Vary the length of the runs as well as paint consistency for affect. If you find you have it a little heavy simply thin it down with clean microscale. If you are unhappy with the result clean it down with a largish 'Wet' brush and start again.

One you are happy with your stains and washes, apply flat finish to the entire model to seal in your work. Next, using the air brush I over sprayed the roof and grilles with Floquil Weathered black. I also gave the bogies a hit with this as well, then blended in the stains and runs with Engine black. To finish of a little Floquil Grime along the lower sides to simulate dust etc. Again I gave the loco a second coat of flat finish to seal it all in. Clean the wheels and the NR is ready for service......Or looks as though it has for quite a while.


The 42 was done much the same. I wanted to create a faded affect for Tuscan 4206. The first wash was done using the Zinc White again mixed with with the microscale to a tea like mixture. Cover the entire model with the wash solution. You will see as it dries it has toned down the bright Tuscan paint.


Rain and weather would have washed the black exhaust residue down the sides of the loco, more heavily around and below the exhaust stacks and vents. This can be done with the same black wash method used on the NR. Before you do this you will need to flat finish the model other wise when you add the black to the white you will end up with a light grey wash. I really only done this black wash on the rear half of the loco leaving the nicely faded area around the nose and roof above the drivers cab.


I created fuel stains below the filler caps on the fuel tank the same way as the runs on the NR. If you want to 'sharpen' up the run, drag a small flat brush, with clean microscale, down either side of the run. Once you are happy you can again blend in the washes and stains with the airbrush weathering colours to finish off.


The affect is a little different from the norm but looks very good when finished. I have also tried these techniques with the steam engines. Using the white for water stains against the weathered black looks fantastic, and black runs on the Green tender sides is a good affect.  You can also create some great rust affects using Burnt Umber, Raw umber and Raw Sienna sponged on using a cosmetic sponge or create rust stains and runs using the same 'Run' technique described above (maybe another post). Have fun anyway.

If you are going to the Sydney show on the long weekend, I will be there with the Coffs Harbour club layout. Drop by and say Gday and see them first hand. I will have the goods wagons that I detailed in the earlier posts as well.
If you can't make it to Liverpool here is a short video of the locos on the layout at the Caulfield Exhibition.

Sunday, September 5, 2010

Loco Week........A Few Weeks Late!

Wow! I can't believe its been three weeks since my last post. Its been frantic here the past couple weeks. This post was intended to be posted before our trip to Melbourne, though the long list of jobs was not completed till the afternoon before we left.

As I mentioned in the previous post, I dedicated the last week to getting some locos ready for the exhibition. I have been doing some decoder installs and weathering for some of the guys in the group, I think its because I have the best eyes!. On the list of jobs I needed to complete for the show, was to install Tsunami Decoders in 5 or so locos, four of these for a Club Member. These being 2 x NR's, 2 x 42's  and an old brass American Union Terrific Bullmoose for myself to use in the American session. As most of our locos are used on the exhibition layout, it has been a high priority to get the best sound quality and volume from the locos. I have found that most of the NSW locos have no room for decent speakers and modifications are needed to fit the speakers in. We have had great success with the 'High Bass' style speakers. Below is a description of the installation in both the NEW Austrains NR and the Trainorama 42 Class. I will describe the weathering process for both using the Water soluble Oil Colours in the next post.

Lets look at the NR first. As mentioned you will need the new version NR.....The ones with working ditch lights. I removed the factory circuit board from the loco leaving the lights in place. I also removed the switches and wiring that control the lighting as these will be controlled using the decoders functions. The decoder used is the TSU-AT1000 (AT for Atlas Version) FDL16. The AT decoders are a bit longer, and are also a bit thinner than the standard Tsunami. It is also not shrink wrapped. They are designed for 'Plug And Play' sound. Wire in the decoder following the wiring colour codes as per the installation instructions. I wired the Front light (white wire) to both the front lights and to the rear RED markers. Then, the rear light (yellow wire) to the rear light, and also to the front RED markers. Each of the decoders function wires can be run to the Ditch lights. Don't forget to wire in the dropping resistors. This will allow the rear red markers to come on when going forward and visa versa when in reverse. The functions on the controller control the ditch lights.
Next, remove the fuel tank cover from under the loco. You no doubt have already done this to remove the light switches. You will see that there is an ideal place for a speaker. The 23mm square High Bass speaker will fit perfectly between the inner sides of the tank. For best results you will need to create a completely sealed speaker box. Run the wires from the decoders speaker terminals, making sure you remember witch one is the positive + wire, and pass them down through the holes in the floor. Next, I sealed these up with some small scraps of 1mm styrene glued over the holes using 5 minute aryldite. 
Now, Solder on the wires to the speaker. The speaker should have a red mark near one of the terminals. This is the + Positive terminal. Glue the speaker in the centre of the tank. Each side of the speaker can now be filled with appropriate sized 1mm styrene making an air tight speaker box. You may need to glue up the small mounting holes in the speaker as well. See Below...... 
  
Speaker mounted in fuel tank with styrene covers glued in place.

AT-1000 FDL16 wired in place

Now you will need to Drill a hole in the Fuel tank cover. I used a 22 mm timber speed bore bit in the cordless drill with the tank carefully clamped in the vise with a couple rags to protect the sides of the tank. Re fit the tank cover and body and your right to go.
Completed speaker mounted in the fuel tank

Now for the 42. These needing a few more modifications compared to the NR. Firstly, Remove everything from the chassis, Circuit Board, Motor, Lights, Bogie's etc. The speaker used for the install is the 28mm High Bass speaker with speaker box from the same manufacturer. The speaker with box will need to be sunk into the chassis of the loco. You will need to remove about 7mm from the rear of the chassis as shown below. This was done by clamping the chassis in the vise and making several cuts with the hack saw about the length of the speaker, then snapping off the sections with a small pair of long nose pliers. It can then be cleaned up with a file. 
Image shows the Modified Chassis above and standard chassis Below.
When the speaker is mounted in the recess, the top worm gear covers for the bogie's will foul on the base of the speaker, I Fixed this by filling away the top of the covers level with the lowest step on the cover. See below.
Modified cover (right) showing removed material level with lowest step.
Wire up the speaker and glue into the speaker box making sure it will be air tight. Next round off the top outside edges of the speaker box as shown below. Be careful not to damage the speaker.
Speaker box with edges rounded off.
One other modification that is not really necessary is to open out the holes under the rear exhaust grilles to let a bit more of of the sound out. Simply remove the grilles and carefully cut out the holes using a scalpel blade. A bit of matt black paint to tidy up any white plastic showing. The fan assembly can be glued to the inside of the grilles and glued back to the body.
Exhaust grilles removed and holes opened out to let a bit more sound out.

You can now re fit everything back to the chassis and install the decoder. The standard Tsunami was used in this one, however I have used the AT version in these as well that are a bit easier to wire in. It may also be necessary to make a small batten across the speaker to Carry the wires from the rear light. This will prevent them from vibrating on the speaker.
The completed install. Note the batten for the rear light wires.
One other change I did make that I did not photograph in detail, was to have separate marker lights. At first I simply removed the main LED from the front light board and mount and wire a separate LED for the front light. The original light wiring can then be wired to the Decoders function terminal and the new LED wired to the front light wire (white). When I did the second one, I left the LED in place and cut the circuit board track to the main LED. The white wire can then be soldered directly to the back of the LED, using a resistor of course. Either method works fine. That's pretty much it. All the locos where then programmed using decoder pro. One of the biggest adjustments that can be made sound wise is to up the Bass level using the decoders built in Equalizer, vastly improving the bass level of the sound. I won't get into the programming as that would take a while. I'm sure you all know how to do this.........
That's all for now. Make sure you check back shortly for the weathering demo.

Saturday, August 7, 2010

Steady Progress

This is a little later than I would have hoped, however between work and house Reno's I have been making steady progress on the stock ready for Melbourne. The CW is just about finished. I just need to tone down the lettering and add a few final touches. Before the body was assembled the timber slats, sides & ends were painted a light grey base colour. Then, after all the slats were glued in place, I was able to add the internal cross bracing. These are made from North Yard 0.005" x 0.030" brass strip pre painted with Floquil Rust. Added also around this time was the coupler release bars. The sides and ends could then be Glued in place.
The horizontal steel bars on the ends were now installed. These could not be put in place earlier as they pass through the corner post that is part of the sides. I discarded the course plastic roof that comes with the kit and replaced the lower section with a piece of 0.010" styrene. Small angled blocks from scale 1" x 3" styrene along with a top runner make up supports for the top half of the roof. AR corrugated iron and a couple styrene battens completing the roof. I then weathered the model with various application of acrylics.
I ended up using the Bergs chassis sides. I also used the flat floor section, though the time it took me to file flat the raised plastic blocks that originally held the brake cylinder etc, would have been quicker to use a piece of styrene. I glue two centre sills, from I beam styrene, to the now flat floor. The ends cut down slightly to accommodate the KD boxes. The side frames also glued in place. I then proceeded to add all the brake detail to the same detail level as previously described in earlier posts along with RP25-88 wheels. The completed underfloor black etched and installed under the wagon. I have left this loose so i canload on some beasts at a later stage. The final weathering applied to the entire model the finish it off. The result i thought was very pleasing.
Must get to and make a diorama instead of a cardboard backdrop!

The KF was also painted and weathered. The decals were a pain to fit. I had some old decals inherited from a deceased estate that had gone hard and broke when slid from the paper. I managed to fit all the appropriate ones including the Capacity and Tare along with the Wagon number on the builders plate. I cheated a bit and used several numbers from Microscale UP loco decal sheet. I also fixed the Coupler release lever so it matched the prototype and added a couple tie down rings on the ends. The lever now hangs from underneath the wagon. Just needs a nice farm tractor to finish it off.

Along with the KF I put through the paint shop the ABV and a couple S and K wagons. I found on a Weathering Forum an article on using Windsor & Newtons Water Mixable Oil Colours for creating Washes, stains and rust. The paints are mixed with Micro Sol decal solution to whatever consistency is required for the job at hand. I Thought i would give it a go on the ABV and the S wagon. I might do a step by step on this technique in another post.

The DOT also found its way to the Paint shop. Like most weathering i do, I get carried away and they usually end up more weather beaten that originally envisaged. The Rust on the top was done using the Oil Colours but sponged on with a cosmetic sponge. Take my advise, ask permission before stealing the wife's!

Last week the postie delivered a big box full of Trainorama BWH/FWH wheat hoppers. These also I wanted weathered ready for Melbourne to make up my block wheat train to run behind the 42. I divided the 20 wagons into about three groups so as to achieve Light, Medium and Heavy weathering so as they didn't end up looking all the same. I added a couple BCH's and an FHG as well.
Above on top is the Medium, and below that the Heavy. I forgot to take a picture of the Light one!
The Heavy weathered BCH. I added weathering to the inside as i will have removable coal loads so i can run empties and fulls. And the FHG below with guard.


Just for an experiment i added some working markers to the rear of the FHG. 0.75mm fibre optics and a couple LED's powered from pickups on the bogie's makes all the difference.

Wagon week was this week, Next week is Loco week. I have a couple decoder installs to do as well as a few repairs and more weathering. As usual not enough time in the day. Sorry for the stack of Photos. They do I feel tell a thousand words. I will try and do a post about the Loco work before my Melbourne trip. If not if you attend the show, drop by the layout and say gday.