I begun by drilling several holes in the floor to let the sound out. I used a 20mm high bass speaker with a 750 Tsunami mounded directly behind. In hindsight I probably should have looked into something with a more appropriate whistle other than the usual K class decoder. I had one spare so ended up using that. I may end up changing it to something different later on. I used 0.010' phosphor bronze for pickups soldered to a PCB strip inside the wagon body then passed through the floor and bent to rub along the inside of the wheel with very light pressure to ensure the wheels will still spin. A sheet of styrene painted flat black was used to cover it all up and provided a top for the speaker box I created around the speaker. The decoder wires were run down through the floor just in front of the speaker box. I covered the plain styrene with heaps of 'junk' detail castings, bits of brass tube, corrugated iron offcuts, chain etc. all painted and weathered to a rusty colour. I also used some chalk weathering to blend it all in. It came up pretty good. I decided that to give the best sound affect I would couple to S wagon with the speaker closest to the loco and with the loco funnel to the wagon. It will normally run cab forward with jib trailing. Before all this can be done I needed to paint the loco.
I usually try and push my limits when I do modelling projects. For me it seems to help improve my modelling. So I guess that the most complicated paintjob for me to tackle would be black with Green side tanks and red and buff Lining. 1052 was at one stage painted in this livery. There is some great pics in the Luffing Crane article in AMRM June 2001. 1052 is also conveniently preserved at the Railway Museum at Dorrigo still showing some of its lined green paintwork and I could access it to take some detail photos. It was also fitted with Auto couplers.

The paint job begun by disassembly of the loco and painting all its components with mirror tone etch black. I also decided to fit a cam disk to one side of the front driver witch meant removal of one wheel. This was of course done before I painted everything black. I then begun the tedious task of masking it all up for the green. I was unsure of the correct colour and due to the fact that 'it never run at Muswellbrook', the correct colour did not matter. I chose TLB's Verdant Green as used for the 38 and 40 class. This was Ideal as I for one didn't need to source it as I had some old stuff here. OK, so you historical Goo roos can tell me now the correct colour.
The red and buff lining proved a challenge. I purchased with the kit bergs lining decals to suit. These are very nice indeed but only provide plain red or plain white. Without layering the decals with a second buff line work, it was easiest for me to hand line the buff directly to the decal sheet using my lining pen. The decal sheet is provided with either square cornered or coved cornered decals. 1052 had the plain square cornered lining so I proceeded to run the buff line just inside the red using a ruler for the straights and coved styrene templates for the corners. The buff is perhaps a little thick but it seemed to look the part. I did find however that once the decals were submerged in the water, some of the pigment bled out from the red line work witch made the buff really stand out. I found too that several applications of decal set were needed to get the decals to soften and conform around the rivets of the side tanks.
The AMRM pics of 1052 show that it had the NSWGR coat of arms crest on the back of the loco. This decal was sourced from Warren at Gwydir Valley Models from some of his old stock. I hand painted the red buffers and sides of the footplate and decaled the white numbers to the front. I finally gave the model a very light weathering and added a few extra details like cab side curtains made from stained tea bags, fireman's shovel sitting on the side tank, fire irons prototypically hanging on the rear handrails and a few ropes etc. hanging from the front buffers and of course a driver. I coupled the prepared S wagon and wired in the decoder to the loco. These locos were never fitted with electrical lights but I wanted to use at least one of the light functions. One of the pics of 1083 in the AMRM article shows a kerosene lamp mounded to the rear of the loco. From the photos and the prototype at Dorrigo 1052 was only ever fitted with a lamp bracket at the front in front of the funnel. As I wanted to run it cab forward I used my 'it never run here anyway' theory and fitted one to the rear. I tried to find a casting of the one I wanted but could not seem to come up with anything, so pushing my limits again I made one up from a section of square brass bar turned in the lathe. I drilled a hole through the centre for the light and fabricated a wire handle for the top, painted it silver so it would stand out. Hey Presto! a working Lantern.
With extra pickups on the S wagon it now runs perfectly with no interruptions. See video below.
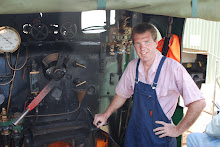
Here are the pics before I weathered and detailed it.


You will notice in the video I did end up creating a small train consist. I am calling it a breakdown train. I found a pic of a departmental CV Van in way and works cream with heavy weathering of its peeling paint. I used an Austrains CV for the van itself and created the peeling paint affect by applying Humbrol Maskol in patches over the pre weathered body. When the Maskol had dried a light application of way and works cream was applied with the airbrush. When this was dry, I removed the Maskol with the end of a small skewer by rubbing it gently along the boards. This leaves a nice peeling paint affect. I left a couple areas with paint so I can apply some appropriate decals. I still need to get one done for the side and a little more weathering to finish off.
I am more than happy with this little model. Its the only one I have ever seen run, and indeed possibly the only one with sound.
Here is the Video!
Catch up soon.
Ian
G'day Ian,
ReplyDeleteWow! Beautiful work there mate. Love it. Now to make the jib move ha ha. You probably will ha ha.
Linton
Wow, that's awesome!
ReplyDeleteI bet now your glad you went to all that effort to put in the sound, it really takes it to the next level.
Nice scenery too, a job well done all round.
Ben
Very nice effort that Ian. Sounds great too.
ReplyDeleteCheers
Chris Wangmann
Ok Ian I'll trade you two station lights for two of those lanterns!!??
ReplyDeleteIan the model looks and sounds fantastic!
Hi Ian
ReplyDeleteVery nice work .
I picked up some back issues of Roundhouse when in Sydney at the convention fron Toms, sorry Bobs Hobbies.
Which you would be interested in if you havent already sen them.
August 2012 has an excellent article,with lots of good pictures on Dubs Steam Crane Locomotives of the NSWGR.
this is a great job, you really have done a better one..make sure that the rails are well checked for the safety of the people..
ReplyDeletecrane rail clips
I will recommend anyone looking for Business loan to Le_Meridian they helped me with Four Million USD loan to startup my Quilting business and it's was fast When obtaining a loan from them it was surprising at how easy they were to work with. They can finance up to the amount of $500,000.000.00 (Five Hundred Million Dollars) in any region of the world as long as there 1.9% ROI can be guaranteed on the projects.The process was fast and secure. It was definitely a positive experience.Avoid scammers on here and contact Le_Meridian Funding Service On. lfdsloans@lemeridianfds.com / lfdsloans@outlook.com. WhatsApp...+ 19893943740. if you looking for business loan.
ReplyDelete