I did not have evidence of the corner wall of stall no.1, as at present they have removed the wall for easier access to the yard, so I decided to stop the wall flush with the outside face of the side wall. This will need to be extended 6" past the centreline of the corner post (half the distance of the corner post which were 12"x 8" hardwood).
I started by cutting five styrene pieces the required length and height for each of the stalls. I added scale 8" to the height to allow for the concrete floor which I will pour with plaster level with the top of the rail. This was actually done on the prototype as well only the step down was done in the slab before the brick wall was constructed......A bit like a brick veneer house. Next was to laminate two long pieces of styrene to each side of these short pieced. The long lengths were divided up with the correct lengths of each of the stalls so I could scribe and slightly bend the styrene around the back wall. This would give me a gentle bend at each of the angle changes and make the whole thing nice and solid.
I lightly glued to the temporary timber base 5 pieced of 20mm square pine on the back side of the rear wall lines previously drawn and set back so the centre of the three styrene pieces (the short ones) was over the centre of the line. Once the glued had dried I could clamp and laminate with MEK each of the three pieces of styrene together.
I wanted to detail the inside of the shed slightly so anything that would stand out needed to be modelled. This included the access doors to the machine shop located behind the rear wall. The rear wall at Muswellbrook has had these access ways bricked in and the different colour bricks used makes them stand out like the proverbials. As can be seen in the lower photo the large double doors can be easily seen from the front of the shed.
 |
| Photo Courtesy of Graham Harvey from his Flikr Site. |
The piers at the rear of the wall at each of the angle change positions were done by simply adding a second layer of brick sheet over the first. It scales out just about perfectly. Of course at the correct width measured from the prototype. The chamfered top edge was also modelled by gently filing along the outer face at about 45 degrees. At least the rain will run off! Seen also is the styrene 'slab' for the machine shop. The use of styrene rather than the poured plaster was done as it will most probably be never seen.
To be able to accurately move the completed rear wall section to its new position on the layout, I added some brass pins to the underside of the wall in all the angle change positions and located right in the centre of the wall. Holes drilled in the timber base keeps it all in the correct location. When I move it to the layout I will lay the temporary sheet in the correct location and drill through the holes into the bench work. On the inside lower face I added two 8" x 6" styrene strips glued together. I will use this as 'formwork' for the slab. My idea will be to mask the painted wall and pour the slab level with the top of the styrene and railhead.
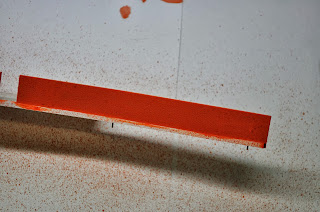
Next was to paint the wall. I have never been real confident at doing brickwork so was time to try a few ideas. I have to admit that the following technique was described to me by Peter Lewis of 'Time and Patients' that we have all admired at the shows. I applied by brush a base colour of Humbrol no.82 matt 'Orange Lining'. This a real orange colour but will tone down with following steps. Next was to add a 'splatter effect' using Humbrol no.100 'Red Brown', no.63 matt 'Sand' and no.33 Matt Black. This is done by slightly thinning the paint with Mineral Turps and using a stiff brush and a gauze or mesh strainer held over the top of the wall, and brushing the bristles on the top side of the gauze. This causes the paint to splatter in fine uneven and random spots over the brickwork. The slight thinning allows the paint to flow slightly and settle on the surface rather than landing and drying in fine spots. Using the paint in the order listed above gives a great effect. Finally, I gave the entire wall a wash of white (with just a small amount of black to turn it grey) Windsor and Newtons water soluble oil paint thinned to a tea like mixture with Isopropyl alcohol to give the appearance of the mortar between the bricks. I ran a cork block slightly soaked in alcohol over the surface just to take off a bit of the white from the face of the brick. I will also use some thinned black to add some grimy rain streaks also. The photos might explain all this dribble better.
The top edge will be painted with Floquil Concrete to finish it all off.
Till next time.


No comments:
Post a Comment