Soon after my first posting of the RH construction, I was kindly offered by fellow blog follower and Modeller Phil Colins, a full set of plans for Parks Roundhouse. Parks was, as shown from the plans, virtually exactly the same as Muswellbrook. Actually the plans state change dates for Muswellbrook. Along with the plans were a disk with numerous colour photos of the RH and service facilities. Wow! Its the sort of stuff you just dream about.......Well me anyhow. And only last week another exciting email from John Proctor (another follower), appeared with more photos showing the exposed roof trusses during its dismantling stage. With Phil and Johns kind permission I will share some of these as the RH model progresses. Thanks again to you both.
Both the above sets of info have been invaluable for the next stage of the RH construction. Originally I was going to copy the roof trusses from the Plans from Ray Pilgrims link and modify them slightly to resemble a close enough Muswellbrook roof profile. However with a full set of plans and detailed photos I could construct almost exact replicas of the trusses. I do say almost as I have steered away from the anal detail by leaving off the nut bolt washer castings etc. The plans show a much more complicated set of roof trusses and the time taken to build just half of them is getting a little lengthy....Yep, I'm over it!
Although I constructed the rear wall from Urethane castings I wanted the character of an old RH and felt that a timber construction was appropriate to achieve this. The inside of the rear walls will hardly bee seen from the front looking in and when weathered a brown black should blend in OK.
A list of all the required timber sizes was made up and a stock take of on hand timber was compiled. I am using mostly Capler timber purchased from Gwydir Valley and Model Railroad Craftsmen with a few in stock lengths of Northeastern. All the timber was pre stained a stick at a time using the techniques described In Garry's Modelfx blog using the Minwax stains firstly with the Classic Grey, then with the Ebony. I added a slight brown tinge to them with diluted Feast Watson Brown Japan stain. In hindsight I could have skipped the classic grey step as the coatings of black and brown seemed to covered most of this up. I made a tray at work to keep all the appropriate lengths in order and to make selection easy.


The RH roof is made up of three different trusses. The main truss runs right from the front to the back and is positioned over the centre of each of the dividing stalls sitting atop the two runs of bearers supported by the main posts. The truss also sits on top of the rear wall posts. At the front, and in between these main trusses are the inner intermediate trusses. These sit on top of the bearers that span between the main posts. At the rear are two sets of rear intermediate trusses. These span from the centre bearer to the rear centre posts. The below photo of the plan shows their position more clearly.

Three separate jigs were made to construct each of the three styles of truss. These were made using sheets of 5mm styrene with the outline of the truss scribed in using a square, scale ruler and scalpel blade. Then gluing with MEK small sections of strip styrene either side of the scale sized timbers until the completed truss jig was made. Each of the timbers were then cut to length and glued together with white glue to make up the truss. I did however find that the pre stained timber did not allow the glue to penetrate and hold real well. Some pieces came apart when removing them from the jig. I simple re glued these into position using some thick CA. I also decided to go along and strengthen the joints with the CA to ensure it does not all fall apart at a later date. I still think the effort of pre staining is worth it.
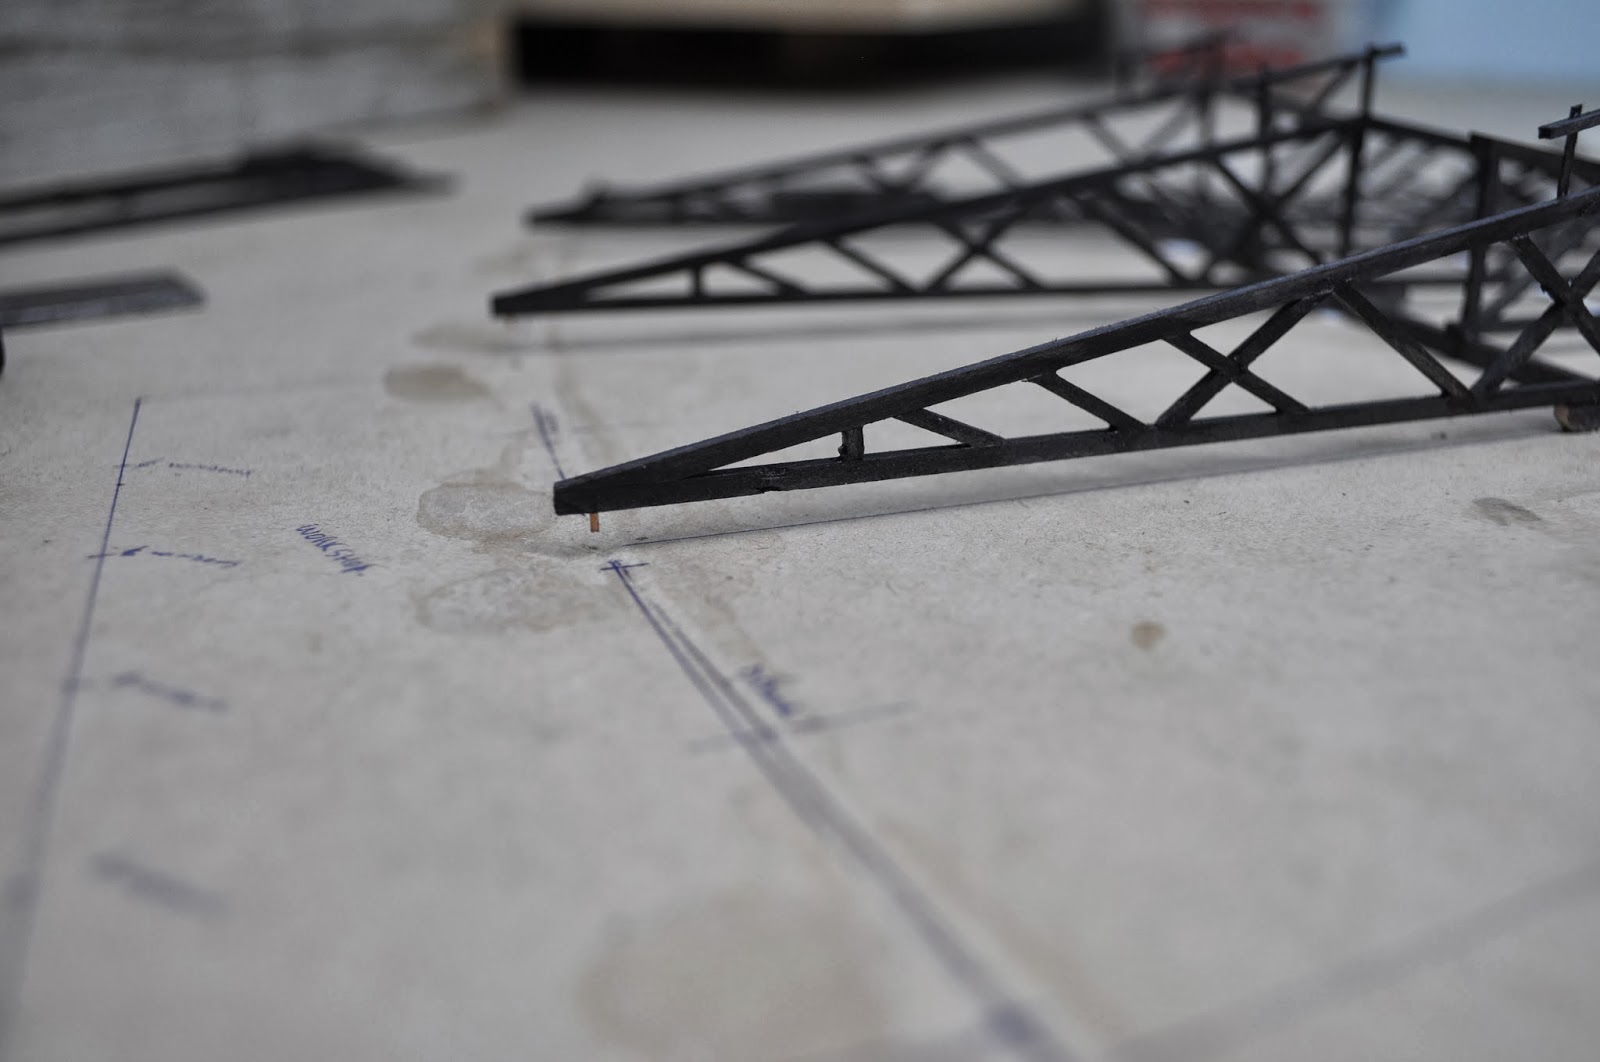
Here are photos of the plan showing the three trusses and the first set of modelled trusses in and out of the jig. Note the unique vented ridge at the peak of the roof that will be correctly modelled.


And here is a shot of Muswellbrooks exposed roof trusses. With thanks again to John Proctor for the use of this photo.

While the slow process of the truss construction continued, I set about setting out the bearers over the drawing I'd done on the temporary base ready for the trusses. The 12"x8" bearers were cut and laid over the arced lines on both the front and centre posts positions. These were held in place with masking tape while the glue dried. Small pieces of paper were layed under the joints to prevent the whole thing sticking to the base. After the glue dried I drilled and pinned, using brass wire, these at the joints leaving the pin above and below the bearer by about 3mm. This will alow me to insert both the truss, and at a later date, the posts to the brass pins making a realy strong joint. The rear of the truss was also drilled and pinned so as they can be possitioned into holes in the rear wall posts. I will not be glueing these ones so I can hopfully remove all the roof section leaving the rear wall in place. The intermediate trusses will only be glued into possition. No pins required.


Till next time.
Ian,
ReplyDeleteyour work is an inspiration, & certainly having the plans that you were given access to has to be a huge benefit, especially with them so detailed not just the side, & the overall above drawing showing the TT, & roads as I have worked on.
The aspect of the inner & rear middle trusses is of interest as I cannot see anything like that on the other plans that I have, all that is evident is there is a single beam to the inner & two on the outer ends that rest on the parallel beams.
Of interest though is that looking at the plans you have the shed lengths, post to post appear identical to those in the 75' RH that Ray has, Maybe these were considered a stronger & better arrangement in RH's than the saw tooth type.
I also have an apology to make. I was given a list some time ago that showed the different types of RH's in NSW, based on roof type, & the list showed Parkes as having the saw tooth, while I visited the depot in 1970 when on loan for a month I did not take much notice of the type & it was at night anyway.
Thus an apology for giving out wrong info. there is a nice link via Google showing the RH & depot near to its opening in 1943. with some very clear photo's.
How I Got My Loan From A Genuine And Reliable Loan Company
ReplyDeleteI am Mrs.Irene Query i was in need of a loan of $150,000 and was scammed by those fraudulent lenders and a friend introduce me to Dr Purva Pius,and he lend me the loan without any stress,you can contact him at (urgentloan22@gmail.com) Approvals within 2-4 Hours
1. Name Of Applicant in Full:……..
2. Telephone Numbers:……….
3. Address and Location:…….
4. Amount in request………..
5. Repayment Period:………..
6. Purpose Of Loan………….
7. country…………………
8. phone…………………..
9. occupation………………
10.age/sex…………………
11.Monthly Income…………..
12.Email……………..
Regards.
Managements
Email Kindly Contact: urgentloan22@gmail.com
All packaging problems certainly don't increase to the amount of both of these examples. An issue may be something of slight significance. articlization sites sooper angelfire about digg more info
ReplyDeleteI will recommend anyone looking for Business loan to Le_Meridian they helped me with Four Million USD loan to startup my Quilting business and it's was fast When obtaining a loan from them it was surprising at how easy they were to work with. They can finance up to the amount of $500,000.000.00 (Five Hundred Million Dollars) in any region of the world as long as there 1.9% ROI can be guaranteed on the projects.The process was fast and secure. It was definitely a positive experience.Avoid scammers on here and contact Le_Meridian Funding Service On. lfdsloans@lemeridianfds.com / lfdsloans@outlook.com. WhatsApp...+ 19893943740. if you looking for business loan.
ReplyDelete