I love the excitement and anticipation of waiting for new models to turn up in the post. A week or so ago I received my long awaited FS/BS coaches. These are very nice cars out of the box but still needed work to bring them up to scratch for both Muswellbrook and for running on our Exhibition Layout. As usual I have left this job to the last minute as I want to take these to the Toowoomba Exhibition to run on the layout next weekend. I also had a few locos to finish off (decoder installs and weathering) along with a trial weathering of LCH's. Below is what I did to my Coaches.
Bogie's
There was a discussion on Ray Pilgrim's Bylong Blog regarding the small springs for the power pickup for the lighting. Some of the cars had crushed springs. These can be replaced with KD coupler springs. All of mine were OK. I did find however that they did not roll freely. Investigation found that all the brake shoe details were rubbing on the wheel treads. No matter how many times I unwound the brake spider they would not loosen off! I gently removed the brake shoe casting from the bogie and proceeded to cut the brake arm just behind the brake shoe, then removed a millimeter from each end of the arms. I then glued the two halves back together using styrene angle for bracing. Make sure that the angle goes to the inside of the arm once back in the bogie. Once the glue had completely dried I reinserted them back into the bogie. To further aid in the free running of the car I applied a small amount of graphite powder to the axle boxes. They were then reinstalled back onto the car. aaaarrrrr much better! 6 cars still not good enough for one Austrains 36!


Body details.
I had consulted the Aus railway gooroo James McInerney regarding the colour of the interiors for these period cars (more on this later). He also mentioned that the lamp brackets were in the lower position. Not prototypical for these earlier colour schemes. Reference from the coaching stock book shows the brackets just above the top buff lining. The lamp brackets are etched brass and can easily be removed with long nose pliers. New holes were drilled and the brackets inserted into the new holes. I filled the old holes with Tamiya putty and touched up the grey putty with Indian Red paint. Once weathered the repair can hardly be seen. I also noticed in the photos that the end hand rails are on the end of the car rather than the side like the model. This seemed a fair bit of work so I agreed to be happy with how they are.


Interior
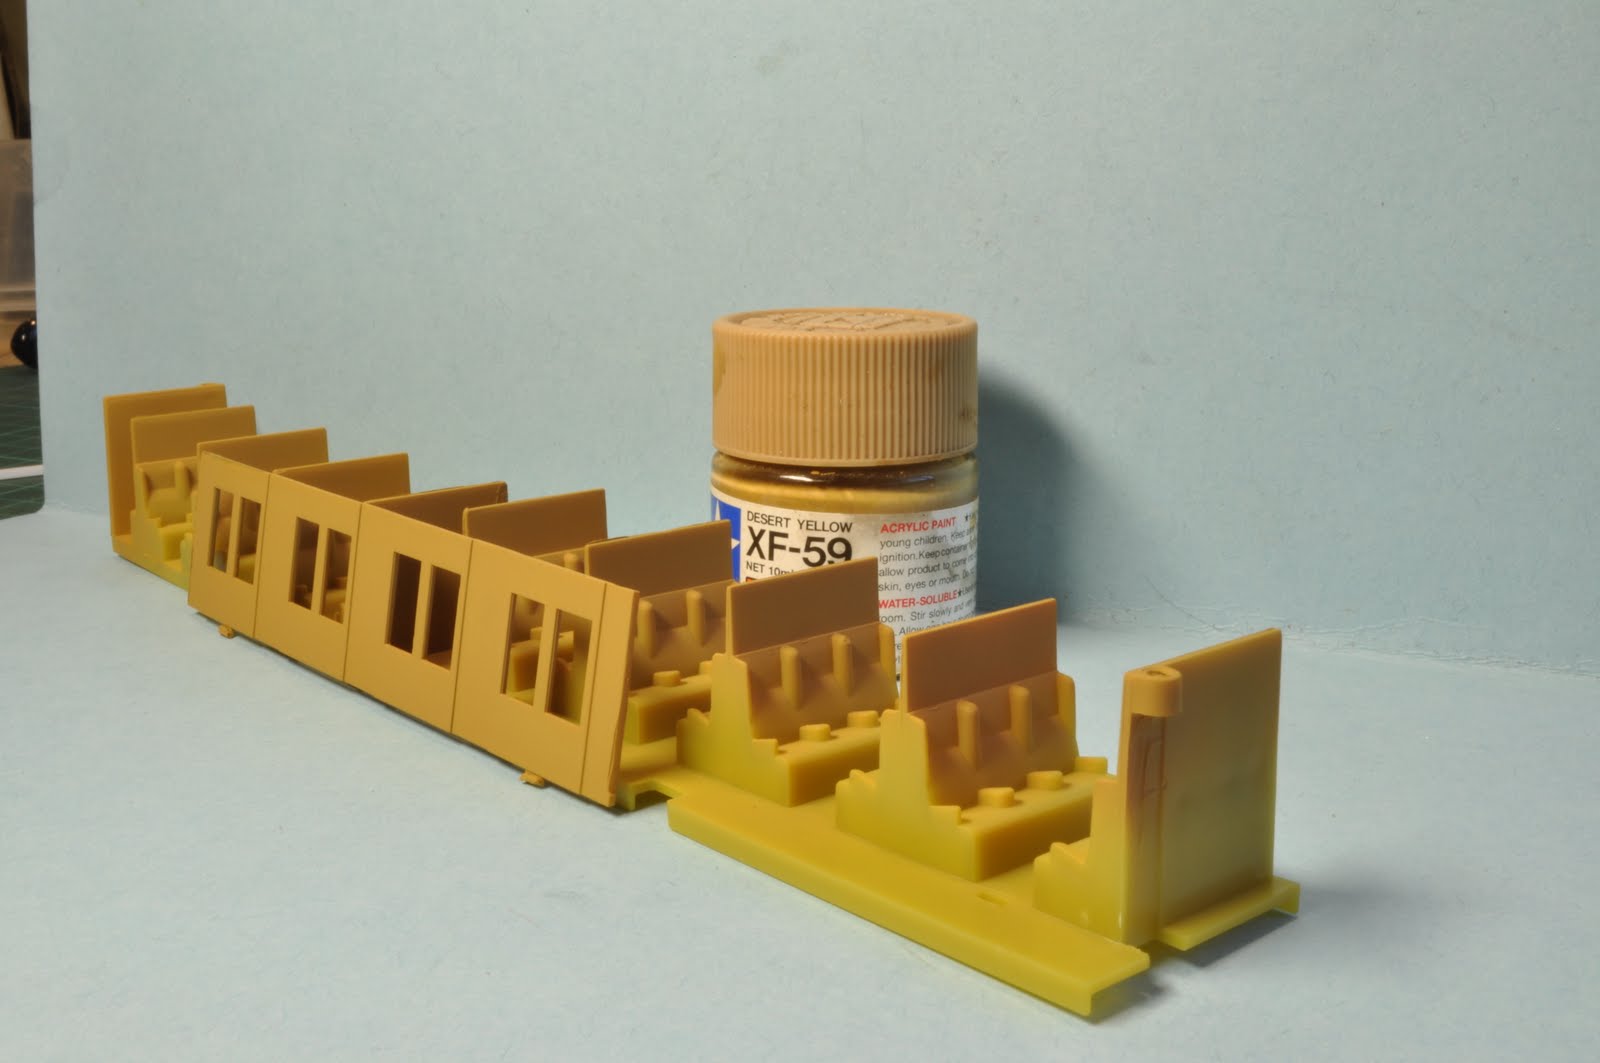
The gaudy interior plastic colour looks terrible. The body is very easily removed by gently pulling the chassis down away from the body. I then removed the two screws holding the light board in, then a further three screws for the seating . I also removed the weight strips, light switch with light board attached and set aside. This now allows me to paint and weather the chassis and bogie's. With the seating section in hand I carefully removed the two wall sections from the sides of each of the compartments. Now we can paint the seats.
James explained that the interior of the BS First class coaches had light coloured varnished timber walls with dark green seat cushions, while the FS Second class cars had varnished walls with maroon seats. I chose a colour close enough for the walls, Tamiya Desert Yellow XF-59. I air brushed the panels above the seats and all the centre wall sections with the desert yellow along with the removed walls. Once dried I made up universal masks from large heat shrink for the panels above the seats. All the green seats were painted, Tamiya J.A. Green XF-13. Then all the maroon seats. For the maroon I mixed both Tamiya red X-7 and Flat Blue XF-9. All the compartment sides can now be re glued back to the seat casting.
I found a photo that showed some of the blinds lowered over the windows. Now is a great time to do this. I started by painting a sheet of printing paper randomly with Model Master Sand and Floquil Earth mixing the two together to create an uneven colour. Both these were slightly thinned with general purpose thinners. Once dried I cut off 8mm wide strips, then cut these into 10mm long squares. The window sections can be removed by carefully running a scalpel blade between the body and the widow plastic. The small squares were then glued with PVA at the top of each window randomly selecting some that were to be lowered. Some half way, some all the way, some a quarter way down......or up!. I even glued blinds on for the ones right up leaving a small section visible at the top of the window to show the blind is there. Once the glue had completely dried I trimmed off the excess with a sharp scalpel. These are now ready to be installed back into the car.


Weathering.
While the widows are out, it is a great time to weather the car. I gave the entire body a light wash with my black Oil colour and Micro sol mix. While these were drying, I gave the bogie's and wheels a hit with black etch. I covered the pickup springs with short pieces of heat shrink to protect them from paint. All the chassis sides and bogie's are then lightly air brushed with Floquil Rust. While this is still soft I quickly moved around the rust colour with a turps wet paintbrush and allowed it to dry. It is a great affect for light rust. All the bogie's and underframe's are then lightly misted with weathered black to tie it all together.
When the wash on the body sections are dry I sealed them so that they can be handled. I temporarily married up the bodies with chassis and lightly misted the lower sections of the cars with Floquil grime to simulate dust. The roofs were also given a spray with weathered black and a bit of Engine Black for weathering. I did want to simulate the malthoid roof sections but am still unsure how to do this without removing the roof vents......Any ideas? Again the cars are given a coat of flat finish to seal it off.
The window glass can now be put back into the car along with reassembling all the interior bits onto the chassis. I have ordered 250 seated people from china that will be perfect, however they have not turned up yet. They will have to run empty at Toowoomba.
Finishing off.
Now that all the cars are back together (that didn't take long) I touched up a few details. I splashed about a bit of gloss black wet with isopropil to simulate oil from the axle boxes. White for the brake spiders and release levers and a bit of gold for the door knobs. I will have a go at lining the doors at some stage when I get brave. The end result looks great. I'm sure the 100 odd passenger will agree.


I mentioned earlier that I done a trial on weathering a couple Eureka LCH's. Muswellbrook will need a heap of these. I was shown this technique by Dean Bradley at the New England convention. He used Derwent tinted charcoal pencils to weather a timber body louver van. I started by applying the same weathering to the chassis section (I removed the coal bunker) in the same way as the FS/BS cars above. The coal bunker was then lightly sprayed with Floquil Concrete as a base colour. Not heavy enough to cover the lettering. I brushed the metal brace details and bits with Floquil Rust. The bunker was then 'coloured in' with the Peat TC18 charcoal pencil. This was then brushed in with a stiff brush. I added in the same way a couple other colours for variation, Natural TC20 and Burnt Earth TC19. I then used a small amount of black pastel powders for a bit of extra colour. Both cars then sealed with flat finish. Next time I might 'Rust Up' the chassis a bit more but overall I am happy with the result.

That's all for now.
Ian
Hi Ian,
ReplyDeleteGreat article on the FS/BS's. Looking forward to doing mine.
Cheers,
Ian
Ian, thanks so much for that! You've saved me a lot of work. I'm looking forward to putting my set of cars to work on the North-West mail.
ReplyDelete